
Overview
The Registry is a database used to store settings and options for the 32 bit versions of Microsoft Windows including Windows 95, 98, ME and NT/2000. It contains information and settings for all the hardware, software, users, and preferences of the PC. Whenever a user makes changes to a Control Panel settings, or File Associations, System Policies, or installed software, the changes are reflected and stored in the Registry.
The physical files that make up the registry are stored differently depending on your version of Windows; under Windows 95 & 98 it is contained in two hidden files in your Windows directory, called USER.DAT and SYSTEM.DAT, for Windows Me there is an additional CLASSES.DAT file, while under Windows NT/2000 the files are contained seperately in the %SystemRoot%\System32\Config directory. You can not edit these files directly, you must use a tool commonly known as a "Registry Editor" to make any changes (using registry editors will be discussed later in the article).
The Structure of the Registry
The Registry has a hierarchal structure, although it looks complicated the structure is similar to the directory structure on your hard disk, with Regedit being similar to Windows Explorer.
There are six main branches, each containing a specific portion of the information stored in the Registry. They are as follows:
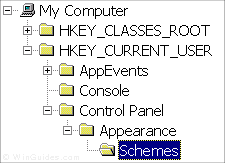
Each main branch (denoted by a folder icon in the Registry Editor, see left) is called a Hive, and Hives contains Keys. Each key can contain other keys (sometimes referred to as sub-keys), as well as Values. The values contain the actual information stored in the Registry. There are three types of values; String, Binary, and DWORD - the use of these depends upon the context.
Each registry value is stored as one of five main data types:
- HKEY_CLASSES_ROOT - This branch contains all of your file association mappings to support the drag-and-drop feature, OLE information, Windows shortcuts, and core aspects of the Windows user interface.
- HKEY_CURRENT_USER - This branch links to the section of HKEY_USERS appropriate for the user currently logged onto the PC and contains information such as logon names, desktop settings, and Start menu settings.
- HKEY_LOCAL_MACHINE - This branch contains computer specific information about the type of hardware, software, and other preferences on a given PC, this information is used for all users who log onto this computer.
- HKEY_USERS - This branch contains individual preferences for each user of the computer, each user is represented by a SID sub-key located under the main branch.
- HKEY_CURRENT_CONFIG - This branch links to the section of HKEY_LOCAL_MACHINE appropriate for the current hardware configuration.
- HKEY_DYN_DATA - This branch points to the part of HKEY_LOCAL_MACHINE, for use with the Plug-&-Play features of Windows, this section is dymanic and will change as devices are added and removed from the system.
Other data types not available through the standard registry editors include:
- REG_BINARY - This type stores the value as raw binary data. Most hardware component information is stored as binary data, and can be displayed in an editor in hexadecimal format.
- REG_DWORD - This type represents the data by a four byte number and is commonly used for boolean values, such as "0" is disabled and "1" is enabled. Additionally many parameters for device driver and services are this type, and can be displayed in REGEDT32 in binary, hexadecimal and decimal format, or in REGEDIT in hexadecimal and decimal format.
- REG_EXPAND_SZ - This type is an expandable data string that is string containing a variable to be replaced when called by an application. For example, for the following value, the string "%SystemRoot%" will replaced by the actual location of the directory containing the Windows NT system files. (This type is only available using an advanced registry editor such as REGEDT32)
- REG_MULTI_SZ - This type is a multiple string used to represent values that contain lists or multiple values, each entry is separated by a NULL character. (This type is only available using an advanced registry editor such as REGEDT32)
- REG_SZ - This type is a standard string, used to represent human readable text values.
- REG_DWORD_LITTLE_ENDIAN - A 32-bit number in little-endian format.
- REG_DWORD_BIG_ENDIAN - A 32-bit number in big-endian format.
- REG_LINK - A Unicode symbolic link. Used internally; applications should not use this type.
- REG_NONE - No defined value type.
- REG_QWORD - A 64-bit number.
- REG_QWORD_LITTLE_ENDIAN - A 64-bit number in little-endian format.
- REG_RESOURCE_LIST - A device-driver resource list.
Editing the Registry
The Registry Editor (REGEDIT.EXE) is included with most version of Windows (although you won't find it on the Start Menu) it enables you to view, search and edit the data within the Registry. There are several methods for starting the Registry Editor, the simplest is to click on the Start button, then select Run, and in the Open box type "regedit", and if the Registry Editor is installed it should now open and look like the image below.

An alternative Registry Editor (REGEDT32.EXE) is available for use with Windows NT/2000, it includes some additional features not found in the standard version, including; the ability to view and modify security permissions, and being able to create and modify the extended string values REG_EXPAND_SZ & REG_MULTI_SZ.
Create a Shortcut to Regedit
This can be done by simply right-clicking on a blank area of your desktop, selecting New, then Shortcut, then in the Command line box enter "regedit.exe" and click Next, enter a friendly name (e.g. 'Registry Editor') then click Finish and now you can double click on the new icon to launch the Registry Editor.
Using Regedit to modify your Registry
Once you have started the Regedit you will notice that on the left side there is a tree with folders, and on the right the contents (values) of the currently selected folder.
Like Windows explorer, to expand a certain branch (see the structure of the registry section), click on the plus sign [+] to the left of any folder, or just double-click on the folder. To display the contents of a key (folder), just click the desired key, and look at the values listed on the right side. You can add a new key or value by selecting New from the Edit menu, or by right-clicking your mouse. And you can rename any value and almost any key with the same method used to rename files; right-click on an object and click rename, or click on it twice (slowly), or just press F2 on the keyboard. Lastly, you can delete a key or value by clicking on it, and pressing Delete on the keyboard, or by right-clicking on it, and choosing Delete.
Note: it is always a good idea to backup your registry before making any changes to it. It can be intimidating to a new user, and there is always the possibility of changing or deleting a critical setting causing you to have to reinstall the whole operating system. It's much better to be safe than sorry!
Importing and Exporting Registry
Settings
A great feature of the Registry Editor is it's ability to import and export registry settings to a text file, this text file, identified by the .REG extension, can then be saved or shared with other people to easily modify local registry settings. You can see the layout of these text files by simply exporting a key to a file and opening it in Notepad, to do this using the Registry Editor select a key, then from the "Registry" menu choose "Export Registry File...", choose a filename and save. If you open this file in notepad you will see a file similar to the example below:
REGEDIT4The layout is quite simple, REGEDIT4 indicated the file type and version, [HKEY_LOCAL_MACHINE\SYSTEM\Setup] indicated the key the values are from, "SetupType"=dword:00000000 are the values themselves the portion after the "=" will vary depending on the type of value they are; DWORD, String or Binary.
[HKEY_LOCAL_MACHINE\SYSTEM\Setup]
"SetupType"=dword:00000000
"CmdLine"="setup -newsetup"
"SystemPrefix"=hex:c5,0b,00,00,00,40,36,02
So by simply editing this file to make the changes you want, it can then be easily distributed and all that need to be done is to double-click, or choose "Import" from the Registry menu, for the settings to be added to the system Registry.
Deleting keys or values using a REG file
It is also possible to delete keys and values using REG files. To delete a key start by using the same format as the the REG file above, but place a "-" symbol in front of the key name you want to delete. For example to delete the [HKEY_LOCAL_MACHINE\SYSTEM\Setup] key the reg file would look like this:
REGEDIT4The format used to delete individual values is similar, but instead of a minus sign in front of the whole key, place it after the equal sign of the value. For example, to delete the value "SetupType" the file would look like:
[-HKEY_LOCAL_MACHINE\SYSTEM\Setup]
REGEDIT4Use this feature with care, as deleting the wrong key or value could cause major problems within the registry, so remember to always make a backup first.
[HKEY_LOCAL_MACHINE\SYSTEM\Setup]
"SetupType"=-
Regedit Command Line Options
Regedit has a number of command line options to help automate it's use in either batch files or from the command prompt. Listed below are some of the options, please note the some of the functions are operating system specific.
Maintaining the Registry
On Windows NT you can use either the "Last Known Good" option or RDISK to restore to registry to a stable working configuration.
How can I clean out old data from the Registry?
Although it's possible to manually go through the Registry and delete unwanted entries, Microsoft provides a tool to automate the process, the program is called RegClean. RegClean analyzes Windows Registry keys stored in a common location in the Windows Registry. It finds keys that contain erroneous values, it removes them from the Windows Registry after having recording those entries in the Undo.Reg file.


